I 3D printed a violin!

3D NEWS | 3D CULTURE | 3D HISTORY | AMAZING SCIENCE | 3D ETHICS | FUN
Showing posts with label 3d tutorials. Show all posts
Showing posts with label 3d tutorials. Show all posts
Friday, January 6, 2017
Friday, June 24, 2016
Golaem Render Workflow
Golaem Render Workflow https://t.co/1i8A07UtVD …#Golaem #Golaem5 #Maya pic.twitter.com/clH9VMvtgW "@CGMeetup via @RiggingArtist— Xea B. (@xeabaudoin) June 24, 2016
Thursday, November 8, 2012
The MakerBot Replicator 2 How It Works
 |
| Photo: Joe Pugliese |
Interesting Article:
Wired: The New MakerBot Replicator Might Just Change Your World
Monday, May 28, 2012
Autodesk 123D catch sculpt make
Design stuff you really want to make, send it straight to a 3D printer
123D
Automatically convert ordinary photos into extraordinary 3D models
123D catch
Shape and paint digital clay into amazing 3D sculptures on your iPad
123D sculpt
Transform 3D models into a pattern for assembling real artful creations
123D make
123D
Automatically convert ordinary photos into extraordinary 3D models
123D catch
Shape and paint digital clay into amazing 3D sculptures on your iPad
123D sculpt
Transform 3D models into a pattern for assembling real artful creations
123D make
0
commentaires

 Libellés :
3d
,
3d art
,
3d designers
,
3d models
,
3d printer
,
3D printing
,
3d tutorials
,
technology
Libellés :
3d
,
3d art
,
3d designers
,
3d models
,
3d printer
,
3D printing
,
3d tutorials
,
technology
Tuesday, April 12, 2011
A milestone in 3D printing
Here comes the copyright infringement question concerning 3D printed objects. As 3D printers are getting much less expensive, one can expect a soon to be time when a certain number of objects will be home made. Of course, objects can be designed with a 3D software, but a shortcut would be to scan the original piece and simply copy it.
But we can expect finding online specialised sites which will offer, free of charge or for a small amount, ready to print 3D files. This new market will probably bring up the same problems we are witnessing with music and video downloading:
As soon as some smart ass will create an equivalent to DivX/ MP3 compression standard, 3D files will be easy to get and millions of artefacts, originally designed and produced by industries, are going to be scanned, available and shared online.
While the already obsolete war on piracy is on, it seems that no one has yet anticipated the forecoming problem, as well as the complete market revolution that will occur. Cheers!
Texte by Armand Dauré
The next Napster? Copyright questions as 3D printing comes of age by Peter Hanna
Read this very interesting article: arstechnica.com
Texte by Armand Dauré
The next Napster? Copyright questions as 3D printing comes of age by Peter Hanna
 |
| Erik de Bruijn, co-founder of 3D printing company Ultimaker, working on his 3D printer. Photo by soulfish |
A very interesting illustration: The Penrose triangle

The Penrose triangle, also known as the Penrose tribar, is an impossible object. It was first created by the Swedish artist Oscar Reutersvärd in 1934. The mathematician Roger Penrose independently devised and popularised it in the 1950s, describing it as "impossibility in its purest form". It is featured prominently in the works of artist M. C. Escher, whose earlier depictions of impossible objects partly inspired it.
The tribar appears to be a solid object, made of three straight beams of square cross-section which meet pairwise at right angles at the vertices of the triangle they form.
How to draw the impossible triangle
Made from three 8-inch boards of wood.
It was done in AutoCAD R14
Using Solidworks
In SketchUp
3D printing

0
commentaires
Libellés :
3d
,
3d designers
,
3d ethics
,
3d immersion
,
3d models
,
3d tutorials
,
3dprinting
,
3dscanners
,
artists 2d 3d
,
inspiration designers
,
plagiarism
,
technology
,
Tools
,
tutorials_2d
Friday, January 14, 2011
3D Modeling precious fundamentals

Remember those "painting" software ads saying you would paint like Rembrandt or Van Gogh?
Of course not! Besides the absurdity of using a software that will make you paint like a master of the past, access to creation cannot be prosthetic and demands skills.
There is no magic, stricto sensu, in softwares, despites the first steps ending up with amazing rubish results.
Andrew Mc Donald is giving us here a master class for beginners (and not only) enlighting what should be obvious: 3D is deeply and strongly rooted in a long time history and is named Sculpture!
Volume must be understood, felt, experienced, and mastered.
A long time ago, when life was in black and white, an old artist teaching drawing, had his motto:
What is drawing? drawing is seeing, looking at what you see, understanding what you see, and reporting it on the paper.
Well, Andrew's brilliant suggestion is of the same wiseness and a perfect introduction to 3D: learn, feel, and understand, the tangibility of matter, virtual or not. Armand Dauré
Who is Andrew McDonald?

3D Modeling Secrets | The Fundamentals cgcoach.com
Sunday, January 2, 2011
Keying is the Key
Graphic Violence
Made with: After Effects, Premiere, 3ds Max, Rayfire.
Music: "City Sounds" and "Untold Story" by Sycamore Drive
Graphic Violence - Making Of
"Stuff used: A building, a green screen, Sam and Niko, After Effects, Adobe Premiere (yeah, that's right!), Rayfire / 3DS Max."
"The Paint Filter Effect is done with the following After Effects filters (in order): Levels (for contrast), Cartoon (2 steps, fill only), Tint (for color)." CorridorDigital
Music: Sycamore Drive - City Sounds
Wednesday, November 24, 2010
3D Visualization Software in Real-time
"SS Foresight treats the development of a 3D visualization project as a rapid prototyping solution. ISS Foresight is a perfect partner for Autocad, Sketchup, Photoshop, 3ds Max, Blender, Illustrator ..."
"..Create animations and images in seconds and present to colleagues and clients in 3D real-time..."
2
commentaires
Libellés :
3d
,
3d models
,
3d tutorials
,
animations
,
architecture
,
inspiration designers
,
software_3d
Friday, October 15, 2010
Build Your World and Play In It
Build Your World and Play In It: Interacting with Surface Particles on Complex Objects
(ISMAR 2010) by Brett Jones

(ISMAR 2010) by Brett Jones

"We present a novel way of interacting with everyday objects by representing content as interactive surface particles.
Users can build their own physical world, map virtual content onto their physical construction and play directly with the surface using a stylus.
A surface particle representation allows programmed content to be created independent of the display object and to be reused on many surfaces.
We demonstrated this idea through a projector-camera system that acquires the object geometry and enables direct interaction through an IR tracked stylus.
We present three motivating example applications, each displayed on three example surfaces. We discuss a set of interaction techniques that show possible avenues for structuring interaction on complicated everyday objects, such as Surface Adaptive GUIs for menu selection.
Through an informal evaluation and interviews with end users, we demonstrate the potential of interacting with surface particles and identify improvements necessary to make this interaction practical on everyday surfaces." Brett R. Jones, Rajinder Sodhi, Roy H. Campbell, Guy Garnett, Brian P. Bailey.
Brettrjones on Vimeo
Paper (PDF) brettrjones.com
ismar10.org
Found here =>cb.nowan.net
0
commentaires
Libellés :
3d tutorials
,
3dmap
,
architecture
,
inspiration designers
,
interactivity
Sunday, October 10, 2010
Wednesday, April 7, 2010
Wednesday, March 3, 2010
Making and Preparing a Rock Arch for a Game Engine
3D Total

Making and Preparing a Rock Arch for a Game Engine by Dimitar Tzvetanov
"This is a tutorial about making a rock arch and then preparing the model for use in game engine. It's simple and fast and shows only the basics. Please note that this tutorial is not for beginners. You will need to have some knowledge of polygon modeling, making the UVs of a model, importing/exporting operations. You’ll also need to be familiar with ZBrush with Photoshop too." Dimitar Tzvetanov.
Friday, February 5, 2010

Thursday, January 21, 2010
How to Create Gross Evil 3D Text (+Video) / Media Militia

"Today we have an amazing tutorial on how to create some very evil, bloody, gory text that even has snake horns and skulls in it. This tutorial includes a video, just in case you don’t understand how to do something or you just prefer to watch me do it. You will learn some exciting new techniques that you can use on your next dark design or Halloween poster..." Jeya.
Saturday, January 16, 2010
Create an Awesome 3D Future City / CG Tutorials
Future City

Piotr Jaroszek
" In this tutorial, I will show you how to create an advanced city of the future inside of 3DS Max. This part of the tutorial will show you how to create all the objects and composite them together. In the second part we’ll take a look at the materials and lights. We’ll also post-process the final image to make it look outstanding! Let’s get started! "...
Thursday, January 14, 2010

Thursday, January 7, 2010
Making of Male Green
Making of Male Green Frog
Author: Massimo Righi
Software: Autodesk MayaAuthor Website: http://www.massimorighi.com/

Hi, my name is Massimo Righi and I am a freelance CG artist from Italy.
What I'm going to do is try and show you the main steps of how I made my "Male Green Frog" image. I used Maya 8 for modelling, MentalRay for rendering and Photoshop for the textures.
The goal for me was to not only create a photo-realistic render, but also a 3d model for animation purposes, without the use of ZBrush (or similar software) and without adding any kind of post-work to the final render.
The first thing was to do some research to find some good references, having in mind the final result I wanted to achieve. I wasn't able to find all the views of the same frog that I wanted, so I mixed a lot of different frogs in order to model the main shape.

I started building the low-poly frog using a simple polygon plane and extruded the edges following the reference pics. I then modelled the main body leaving holes where the legs were to be connected.

After that, I created the legs and then joined them to the body.

As you can see from the WIP pic below, I've built only half of the frog so that I had only half of the UV map to deal with.

For the main (half) body and the leg, I made 2 cylindrical maps and for the feet I used 2 planar maps: 1 from the top view and one from bottom view. I used a simple checker applied to a lambert shader for checking the overall process while tweaking the UVs.
After that, I duplicated the half and combined everything together, ending up with 1.960 polygons, which is quite good for the low poly model (this then can be used as a cage for the rigging/animation process).
I than duplicated the frog keeping the low model in another layer, and then made the higher poly version (about 30.000 poly) doing a polysmooth. Finally, I added some details using the Maya sculpting tools, trying always to follow the main reference.

Using photos and freehand (I used a Wacom tablet), I made the textures in Photoshop each 2048x2048. Then I applied the texture to the frog, but I did notice (I was expecting that ) that some of the texture seams needed to be adjusted. So I used the built-in Maya 3d paint for that, using the clone tool.
When the color texture was made, I created the specular, bump and diffuse maps from it.


Now was the time for setting up the scene. I created a simple plane where I placed the frog and rotated it about 17° (I've done the same for the frog too). For the plane texture, I used a photo made by me and cropped it to about 1300x900... then I made the bump.

I created a camera and enabled the depth of field on it. As you can see from the grab, I made a distance tool placing one locator in the point of focus on the model and the other locator in the camera lens. I than parented that locator to the camera so that when I was moving the camera, the dimension value was also changing.
Before working on lighting, I made the shader networks; one for the main frog and one for the eyeballs. After some render tests, I decided to use a blinn shader with a Translucence value=1 for both.

For the lighting setup, I used an HDRI probe and 3 lights: 1 point-light (raytrace shadow) and 2 spotlights.


For the MentalRay render settings, I used a mitchell filter with a sample level min=1 max=3, Ray tracing and Final-Gather.

Here is the final render of the frog.
I want to thank all of you for reading, and hope that it will be helpful in some way.

Enjoy!


via en.9jcg.com
Wednesday, January 6, 2010
Tutorials for Maya starting research
This is just an example to answer Johnathane's question "how to start with Maya"
Start your search on YouTube
For example this tutorial explains how to start!
Beginner's tutorial: Maya Basics, Part 1. Preferences, interface, object creation.
You can type on this blog " Maya Tutorials" on Google search ( 3D TODAY Easy research through keywords)
But Autodesk Maya returned 112 results "tutorials maya"
Research on real time "Maya"
If you have better solutions, please post them here!
More links:
http://www.tutorialized.com/tutorials/Maya/1
http://www.creativecrash.com/maya/tutorials/
http://www.learning-maya.com/
Start your search on YouTube
"Maya tutorials for beginners"
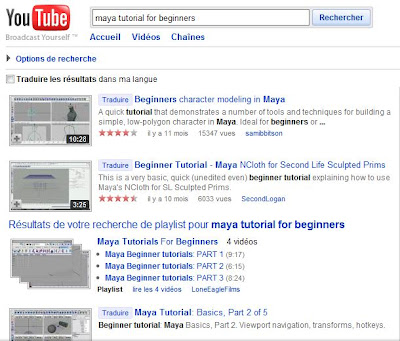
For example this tutorial explains how to start!
Beginner's tutorial: Maya Basics, Part 1. Preferences, interface, object creation.
Digital Art Guide / videos tutorials 3ds Max and Maya
Free Video Tutorials for Maya.
It is interesting too take a tour to Wikipedia for the history of Autodesk Maya
Autodesk Maya / Wikipedia.
You can type on this blog " Maya Tutorials" on Google search ( 3D TODAY Easy research through keywords)
But Autodesk Maya returned 112 results "tutorials maya"
Research on real time "Maya"
If you have better solutions, please post them here!
More links:
http://www.tutorialized.com/tutorials/Maya/1
http://www.creativecrash.com/maya/tutorials/
http://www.learning-maya.com/
Sunday, December 13, 2009

Subscribe to:
Posts
(
Atom
)